
A Live Activity in iOS is a special type of interactive widget that displays real-time information from an app directly on the Lock Screen and, on iPhone 14 Pro models and later, in the Dynamic Island. They’re designed for short-lived, glanceable updates—like tracking a food delivery, following a sports score, or showing a running timer—so users don’t need to constantly reopen the app. Built with ActivityKit, Live Activities can be updated by the app itself or through push notifications, and they automatically end once the tracked task or event is complete.
In this post, we’ll walk through an iOS app project that covers the entire flight reservation journey—from the moment your booking is confirmed to when your bags arrive at the baggage claim. At the end, you’ll find a link to the GitHub repository if you’d like to download the project and try it out yourself.
Project Setup
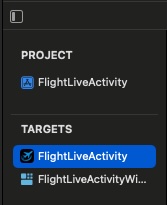
To carry out this project, we started with a blank iOS app template containing two targets: one for the main app itself and another for a Widget Extension.
Go to the Signing & Capabilities tab of your iOS app target and enable the Push Notifications capability.
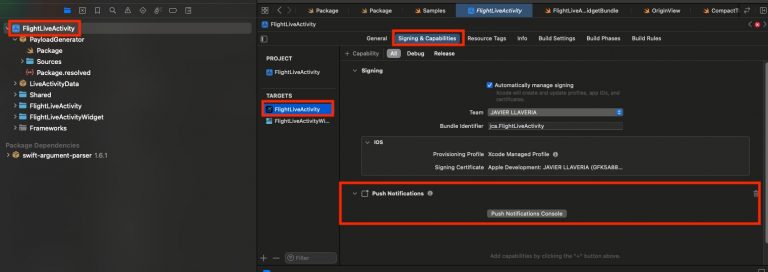
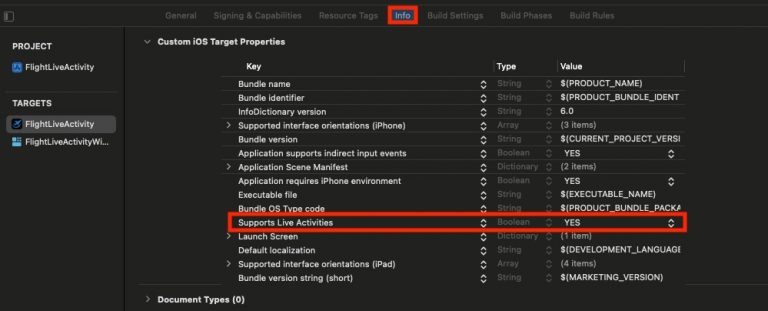
We need this because Live Activity state changes are triggered by push notifications. Next, update the Info.plist to support Live Activities:
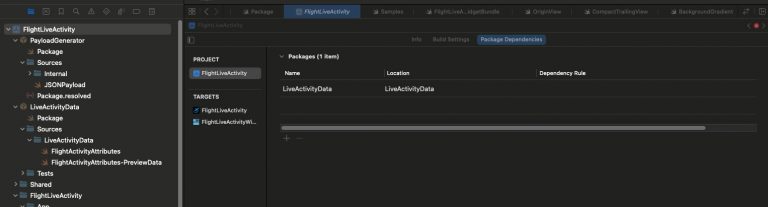
Regarding Widget Extension Target, no extra setup is required. When we review project explorer we will face 2 packages:
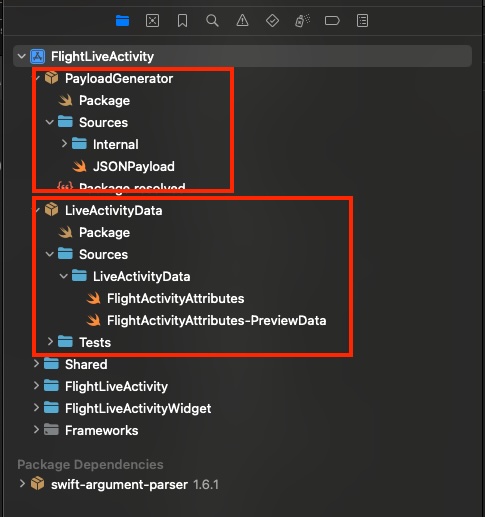
Payload Generator is a small command-line tool that prints JSON payloads to the console, ready to be pasted directly into the push notifications console. LiveActivityData contains all data structures (and sample data) related to Live Activities. Including them in a package allows the module to be imported by the iOS app, the Widget Extension, and the Payload Generator
Up to this point is all you need to know about the project, deploy the app on a real device:

In addition to handling Live Activity state changes through push notifications, we’ll also manage them internally from the app itself by triggering updates with a button.
Create Booking
For creating a new booking, we will create internally from the app just pressing the corresponding button. The app follows MVVM architecture pattern and the method for handling that in the View Model is following:
func startActivity(initialState: FlightActivityAttributes.ContentState) {
let attrs = FlightActivityAttributes.bookingActivity
let content = ActivityContent(state: initialState, staleDate: nil)
do {
currentActivity = try Activity.request(
attributes: attrs,
content: content,
pushType: .token
)
refreshActivities()
} catch {
logger.error("Failed to start activity: \(error.localizedDescription, privacy: .public)")
}
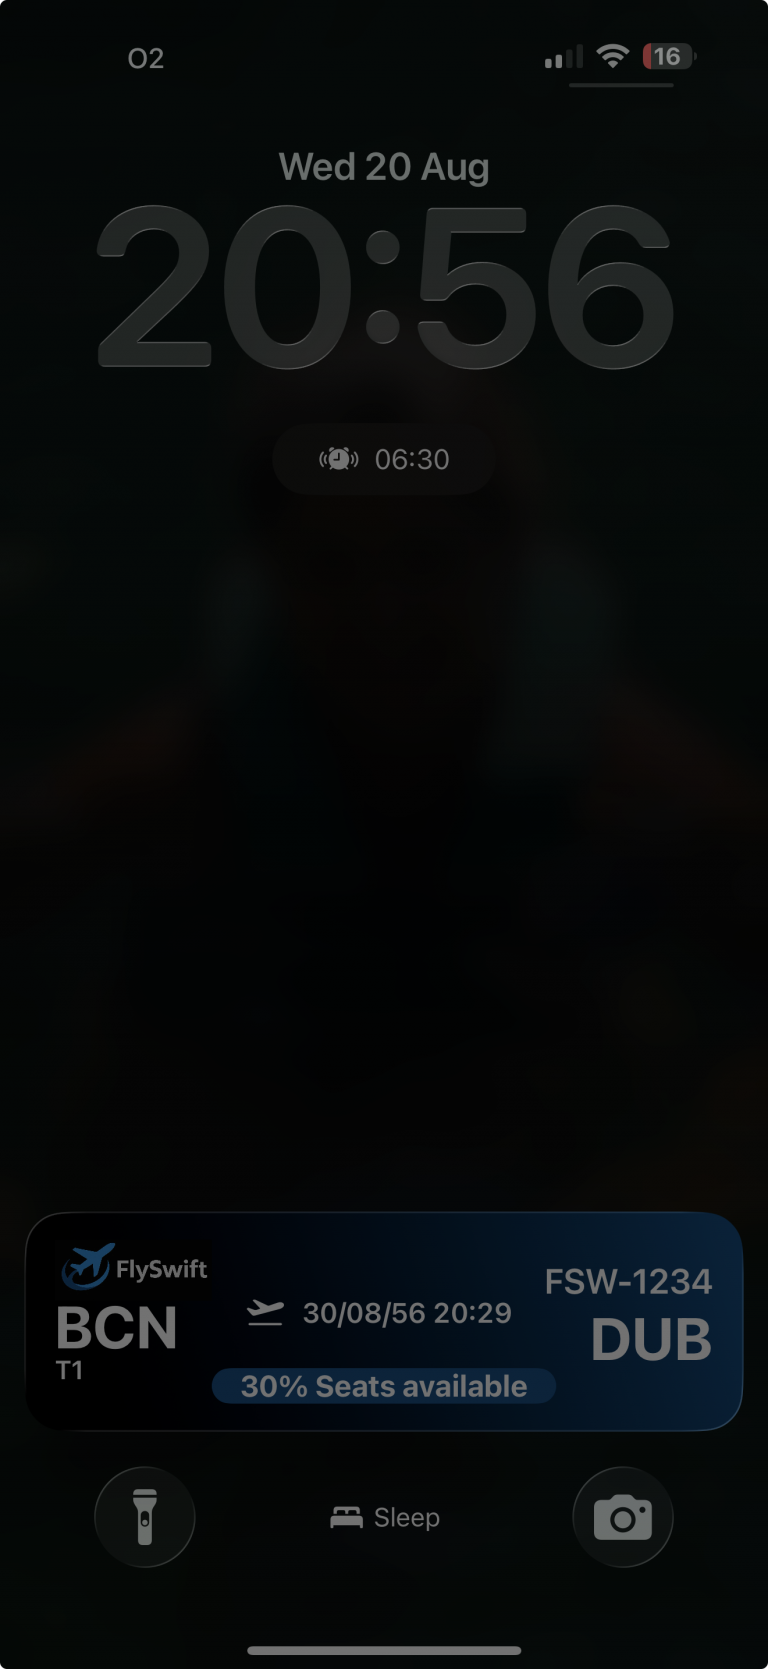
} If we move out from the app we will see dynamic island (left) and block screen (right) presenting a Widget with following content:


Running out of seats
To let our customers know about seat availability for their booking, we’ll send a push notification to the app with the updated seat information. The first step is to open the Push Notifications console:

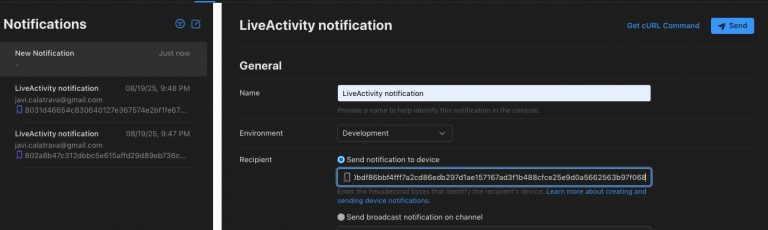
Log in with your Apple Developer account and open the Push Notifications dashboard. Verify that you’ve selected the correct team and Bundle ID, then click Send and choose New.
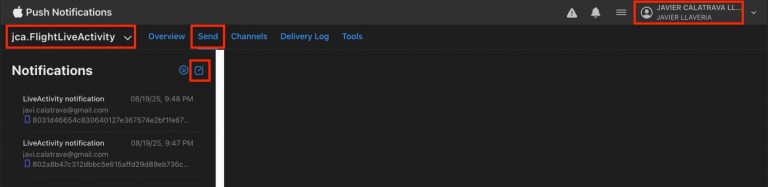
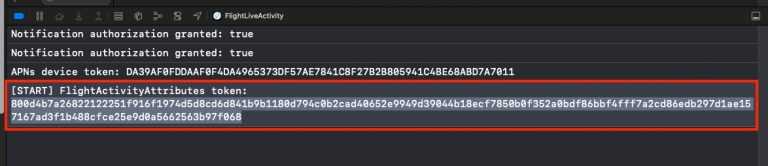
Log in with your Apple Developer account and open the Push Notifications dashboard. Make sure you’ve selected the correct team and Bundle ID. Then click Send and choose New. For Name, enter a descriptive label to help you recognize the purpose of this push notification. Next, under Recipient, paste the last hex code that appeared in the logging console.
To generate the JSON payload for the push notification, we’ll use our command-line tool. Run the following command:
$swift run PayloadGenerator 2
Here, 2 generates a sample template showing 30% of the available seats.»
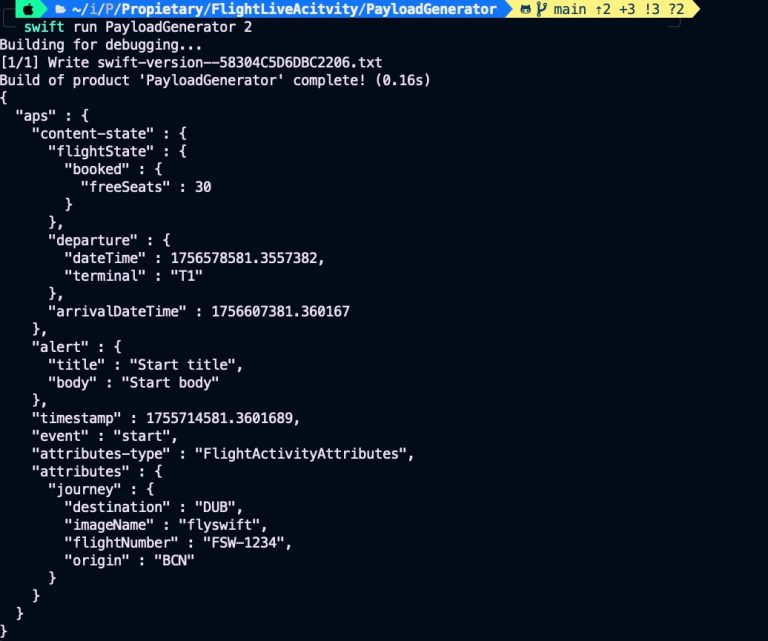
On apns-push-type select liveactivity and paste previous generated download on payload:
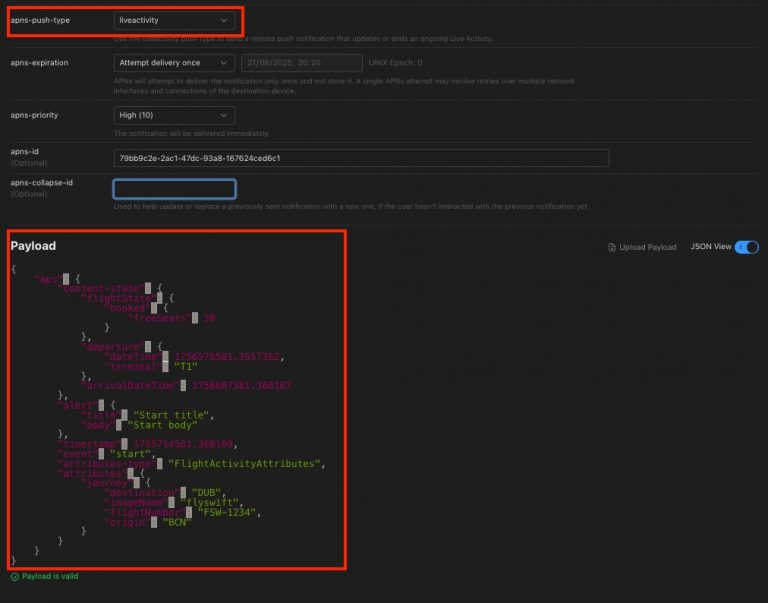
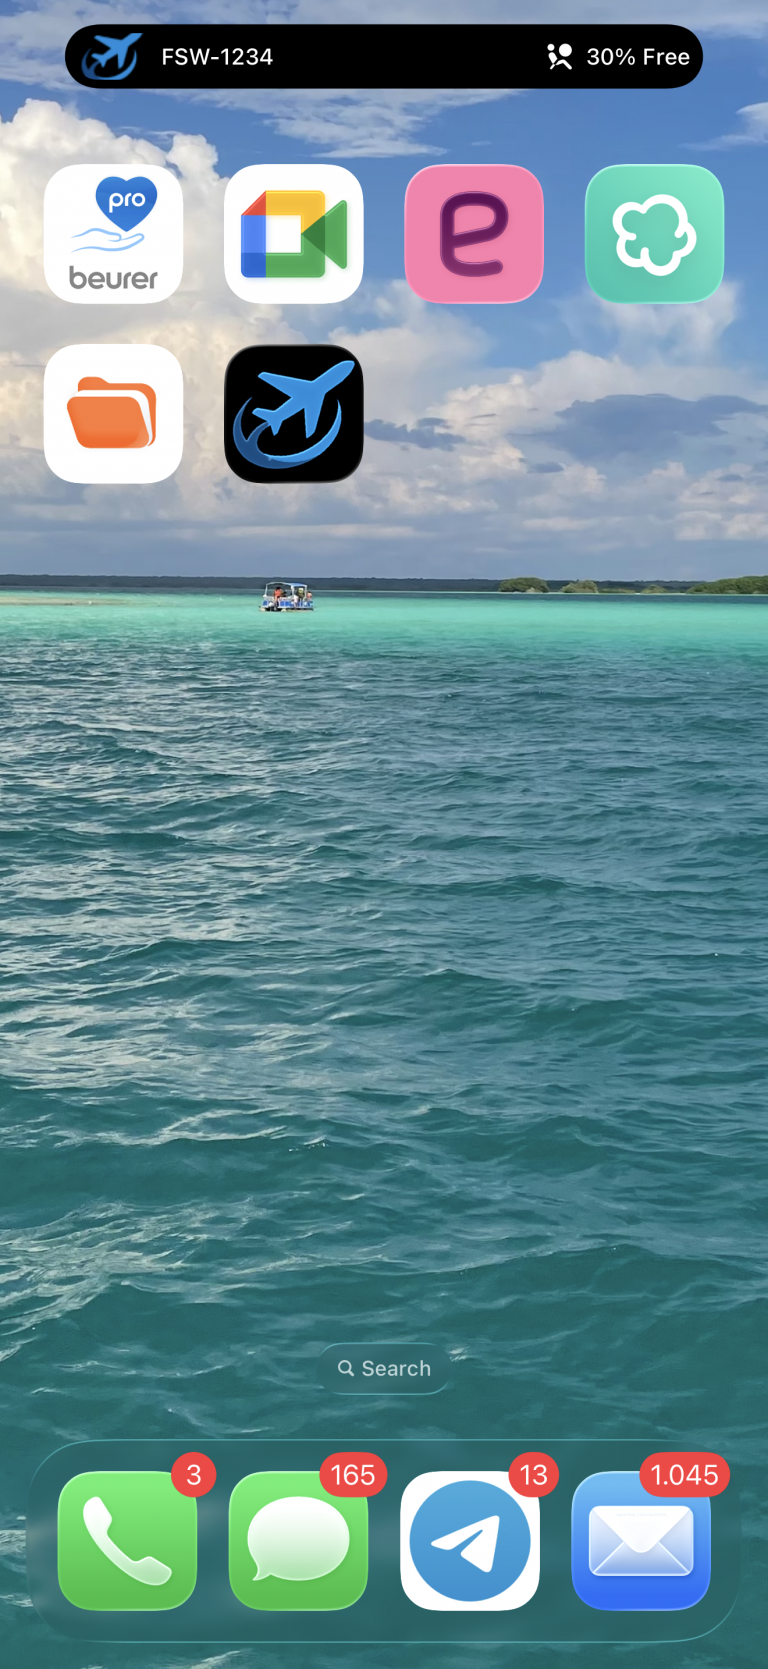
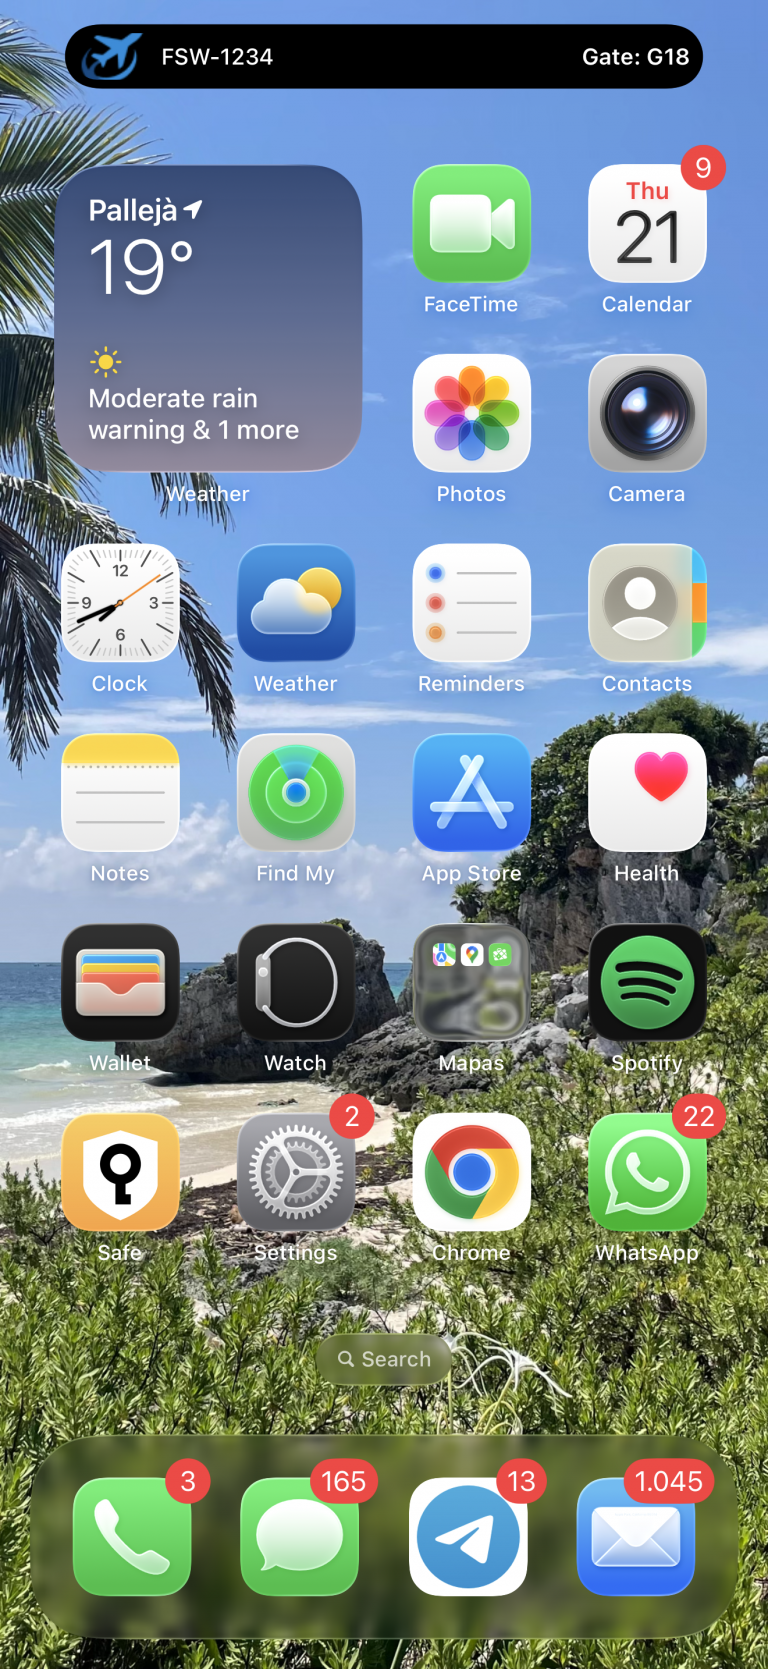
Press the Send button, and you’ll see the following content displayed on the device—both in the Dynamic Island and on the Lock Screen widget:»
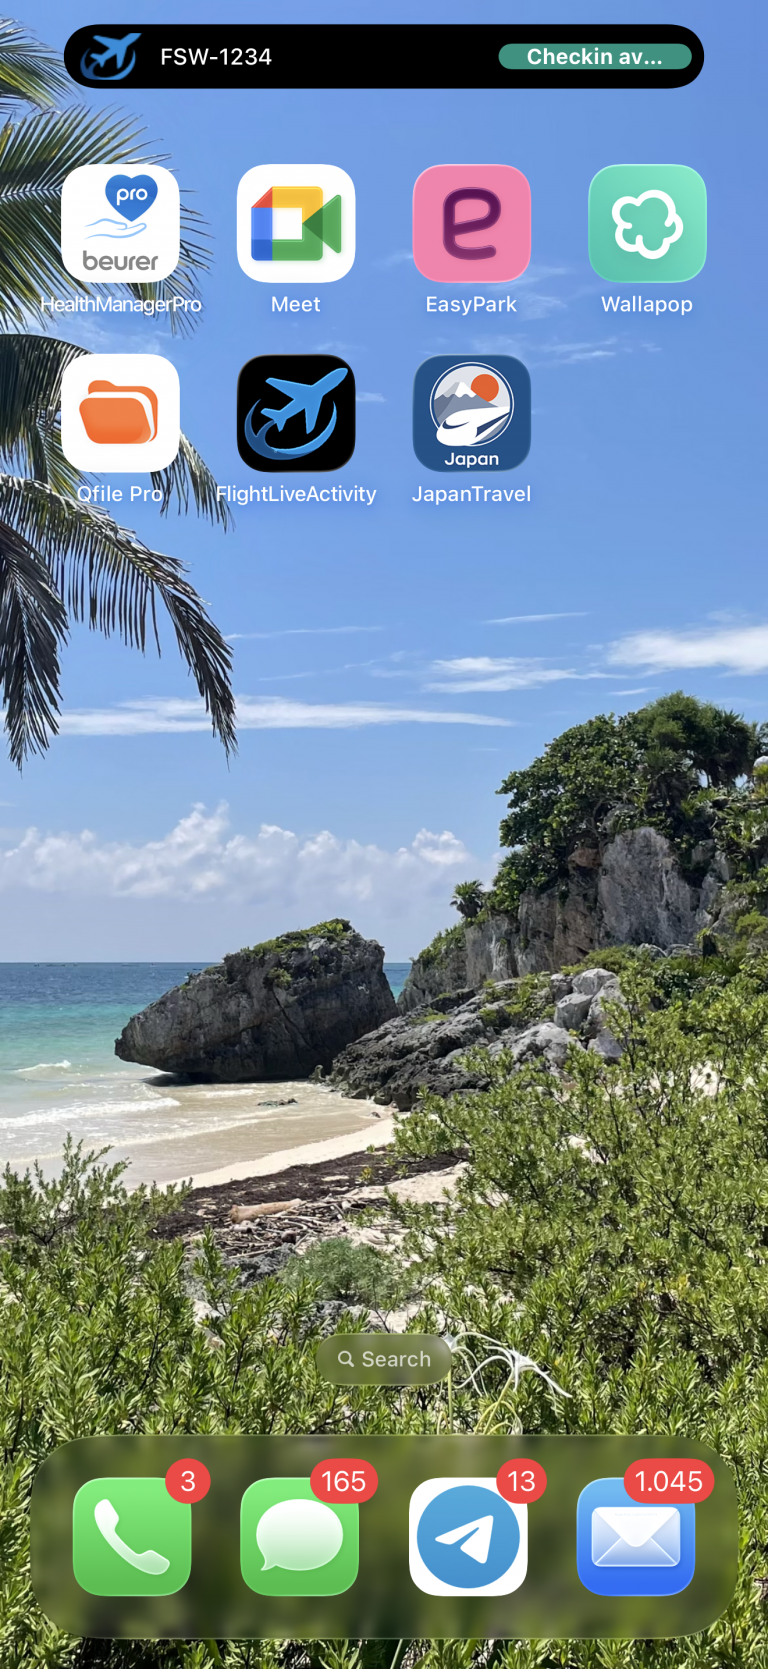
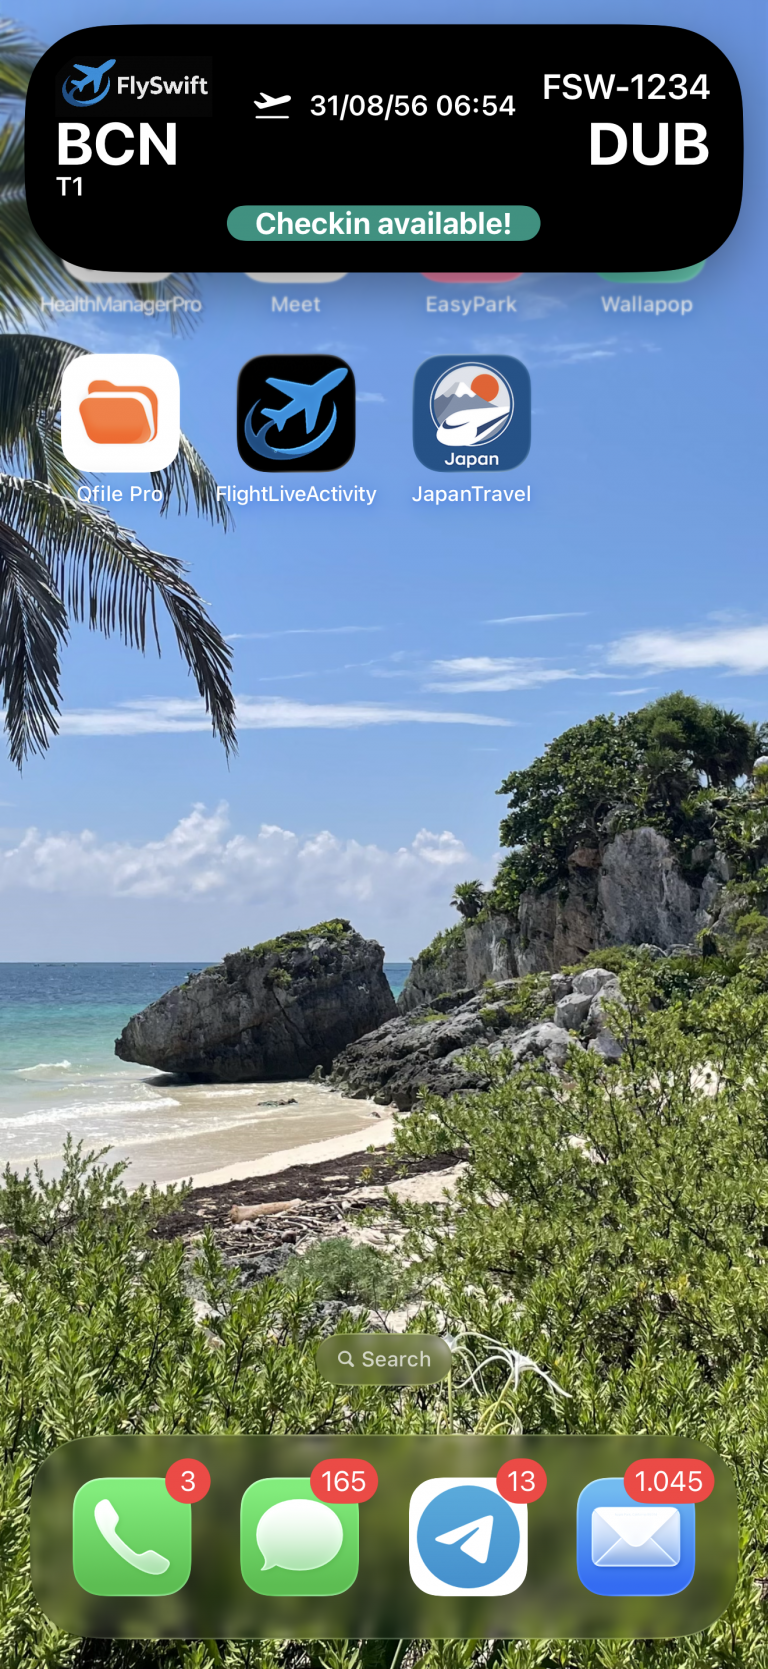
Checkin available
A few weeks before a flight departs, airlines usually allow users to check in online. To generate the payload for this scenario, run:
$swift run PayloadGenerator 3
Here, 3 generates a sample template that enables the user to perform online check-in. In the Push Notifications dashboard, update the token, paste the payload, and send the notification. You should then see the following:
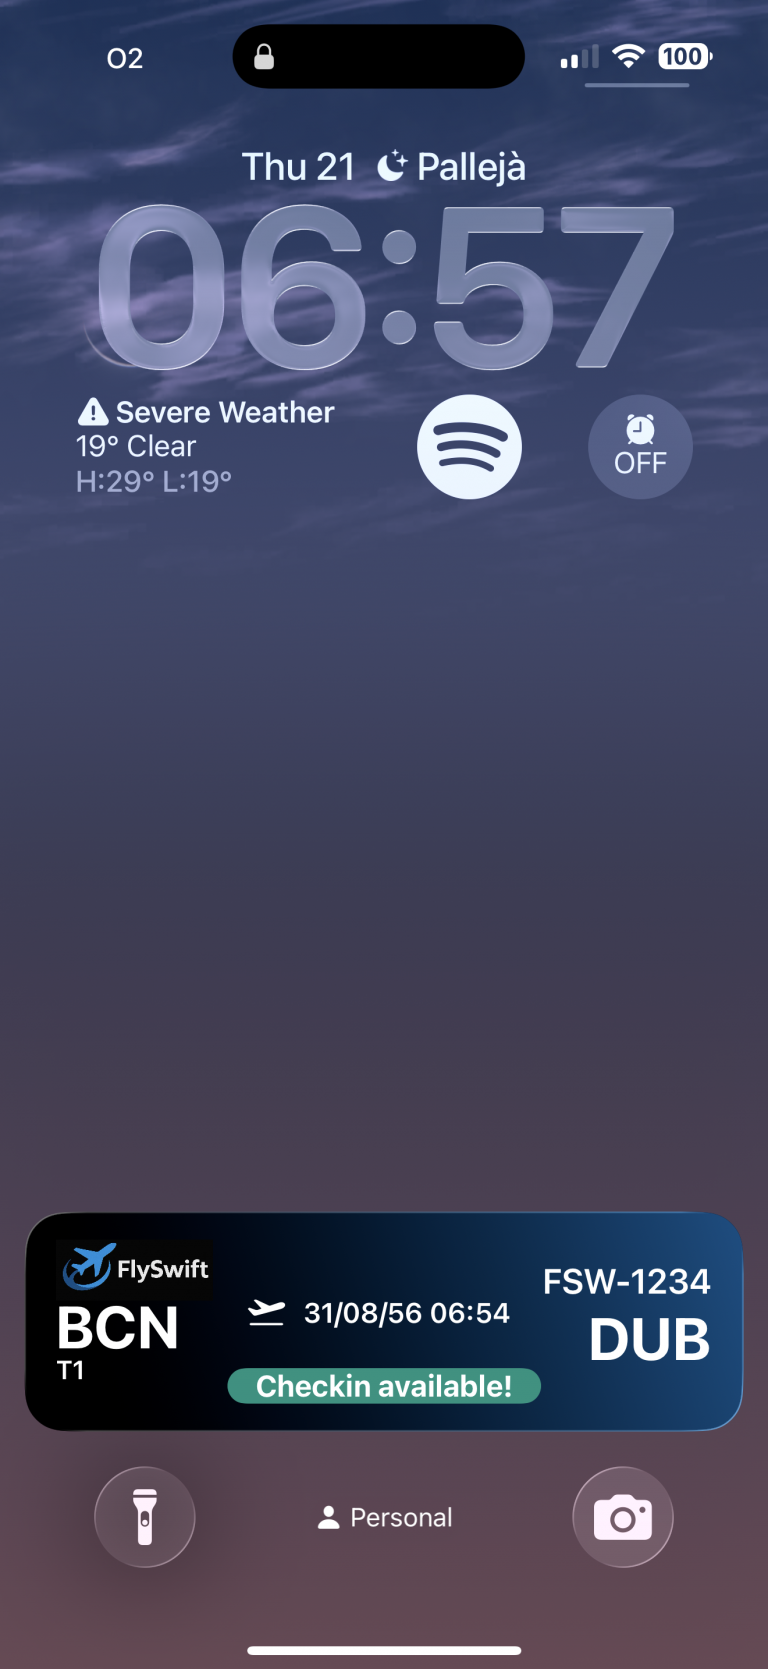
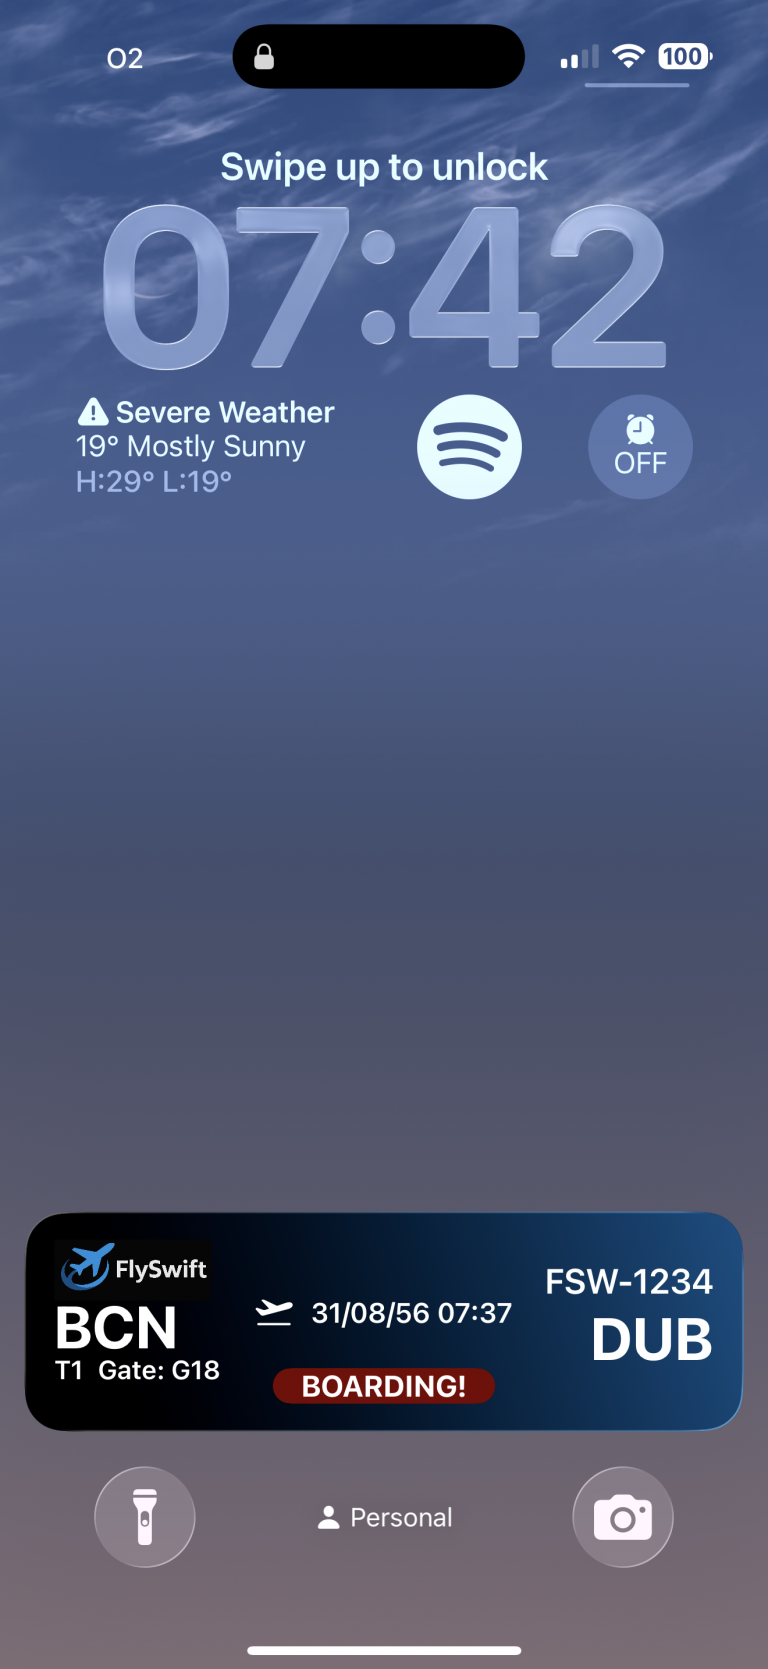
When a push notification arrives, the Dynamic Island first appears in compact mode (left). If the user taps it, the Dynamic Island expands (center), and finally the widget is shown (right) when user blocks device. Notice that the widget displays a gradient background, while the Dynamic Island does not—this is because the Dynamic Island is designed to cover the area where the camera and sensors are physically located on the device screen.
It’s important that the widget and the expanded Dynamic Island share the same composition to ensure maintainability and to simplify the addition or removal of new states. WidgeKit facilitates it by allowin developer implement it on the same class:
struct BookingFlightLiveActivity: Widget {
var body: some WidgetConfiguration {
ActivityConfiguration(for: FlightActivityAttributes.self) { context in
let attrs = context.attributes
let state = context.state
FlightWidgetView(attrs: attrs, state: state)
} dynamicIsland: { context in
let journey = context.attributes.journey
let state = context.state
return DynamicIsland {
DynamicIslandExpandedRegion(.leading) {
OriginView(
imageName: journey.imageName,
origin: journey.origin,
departure: state.departure,
flightState: state.flightState
)
}
DynamicIslandExpandedRegion(.trailing) {
DestinationView(
flightNumber: journey.flightNumber,
destination: journey.destination,
arrivalDateTime: state.arrivalDateTime,
flightState: state.flightState
)
}
DynamicIslandExpandedRegion(.center) {
CentralView(
departure: state.departure,
flightState: state.flightState
)
}
DynamicIslandExpandedRegion(.bottom) {
ExtraView(flightState: state.flightState)
}
} compactLeading: {
CompactLeadingView(
origin: journey.origin,
destination: journey.destination,
flightNumber: journey.flightNumber,
flightState: state.flightState
)
} compactTrailing: {
CompactTrailingView(
flightNumber: journey.flightNumber,
flightState: state.flightState
)
} minimal: {
MinimalView()
}
}
.supplementalActivityFamilies([.small, .medium])
}
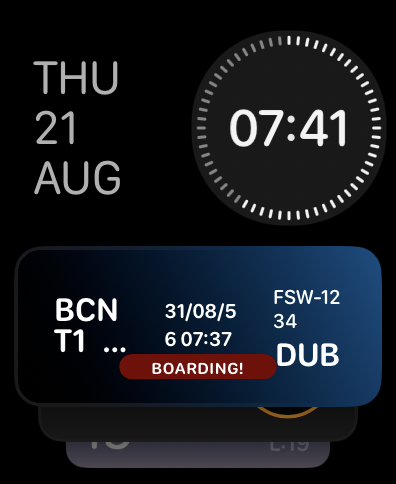
} This Swift code defines a Live Activity widget called BookingFlightLiveActivity for an iOS flight booking app. It uses ActivityConfiguration to display real-time flight information on the Lock Screen and within the Dynamic Island. On the Lock Screen (FlightWidgetView), it shows booking attributes and state (such as departure, arrival, and flight status). For the Dynamic Island, it customizes different regions: the leading side shows the origin airport, the trailing side shows destination details, the center highlights departure and status, and the bottom provides extra information. It also specifies how the widget appears in compact leading, compact trailing, and minimal Dynamic Island modes. Additionally, it declares support for extra widget sizes (.small and .medium) through supplementalActivityFamilies; for example, .small is used to present the widget on Apple Watch.
Another important detail is the context, which holds the presentation data. This is divided into two groups: attributes, which are fixed values (such as journey details), and state, which contains variable information that changes as the Live Activity progresses.
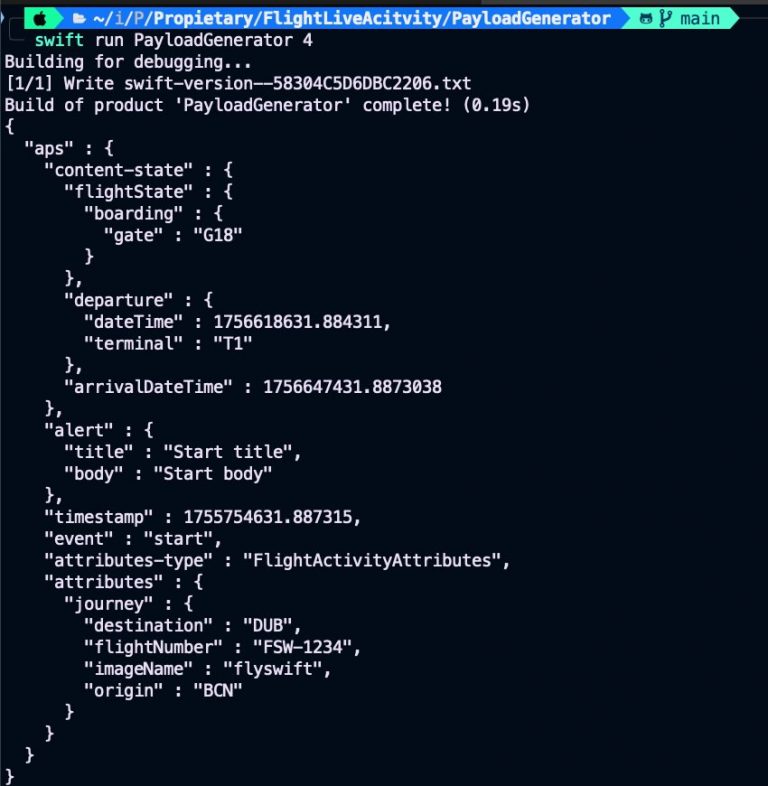
Boarding
Now, it gets time of boarding. At this stage we’re going to take a look at the command line tool that we have also developed and facilitates work for generating JSON payload for push notification. To generate the payload for this scenario, run:
$swift run PayloadGenerator 4
Here, 4 generates a sample payload template that enables the user be informed about the boarding gate.
JSONPaload command line tool just parses input atttirbutes and executes its function associated:
import ArgumentParser

@main
struct JSONPayload: ParsableCommand {
    @Argument(help: "Which step of the live activity cycle to generate as JSON")
    var step: Int

    @Flag(help: "Prints date in a human-readable style")
    var debug: Bool = false

    mutating func run() throws {
        let jsonString = switch step {
        case 1: try bookedFlight(debug: debug)
        case 2: try bookedFlight30Available(debug: debug)
        case 3: try checkinAvailable(debug: debug)
        case 4: try boarding(debug: debug)
        case 5: try landed(debug: debug)
        default:
            fatalError("No step '\(step)' defined")
        }
        print(jsonString)
    }
}
JSONPaload command line tool just parses input atttirbutes and executes its function associated:
func boarding(debug: Bool) throws -> String {
    let contentState = FlightActivityAttributes.ContentState.boarding
    let push = PushPayload(
        aps: StartApsContent(
            contentState: contentState,
            attributesType: "FlightActivityAttributes",
            attributes: FlightActivityAttributes.bookingActivity
        )
    )
    let data = try JSONEncoder.pushDecoder(debug: debug).encode(push)
    return try data.prettyPrintedJSONString
} FlightActivityAttributes.ContentState.boarding is same sample data code used also in the app (and widget). Is packaged into LiveActivityData because in that way allows data structure being used by command line tool. This is how PayloadGenerator/Package file declare its dependency with LiveActivityData package:
import PackageDescription

let package = Package(
    name: "PayloadGenerator",
    platforms: [.macOS(.v15)],
    dependencies: [
        .package(url: "https://github.com/apple/swift-argument-parser.git", from: "1.2.0"),
        .package(path: "../LiveActivityData"),
    ],
    targets: [
        // Targets are the basic building blocks of a package, defining a module or a test suite.
        // Targets can depend on other targets in this package and products from dependencies.
        .executableTarget(
            name: "PayloadGenerator",
            dependencies: [
                .product(name: "ArgumentParser", package: "swift-argument-parser"),
                .product(name: "LiveActivityData", package: "LiveActivityData"),
            ]
        ),
    ]
)
And this is how is set this dependency on iOS app:
Add package dependency to project, and the import dependency at time of coding
...
import LiveActivityData

// MARK: - View

struct BookingBoardView: View {
    @StateObject private var controller = BookingBoardViewModel()
...
After sending notification user should have to see in device and also in Apple Watch following:
Landing
Your Live Activity for a flight reservation isn’t the only one running on the iOS device. In the following screen sequence, you can see that while a screen recording Live Activity is active, a push notification arrives with updated flight landing information.
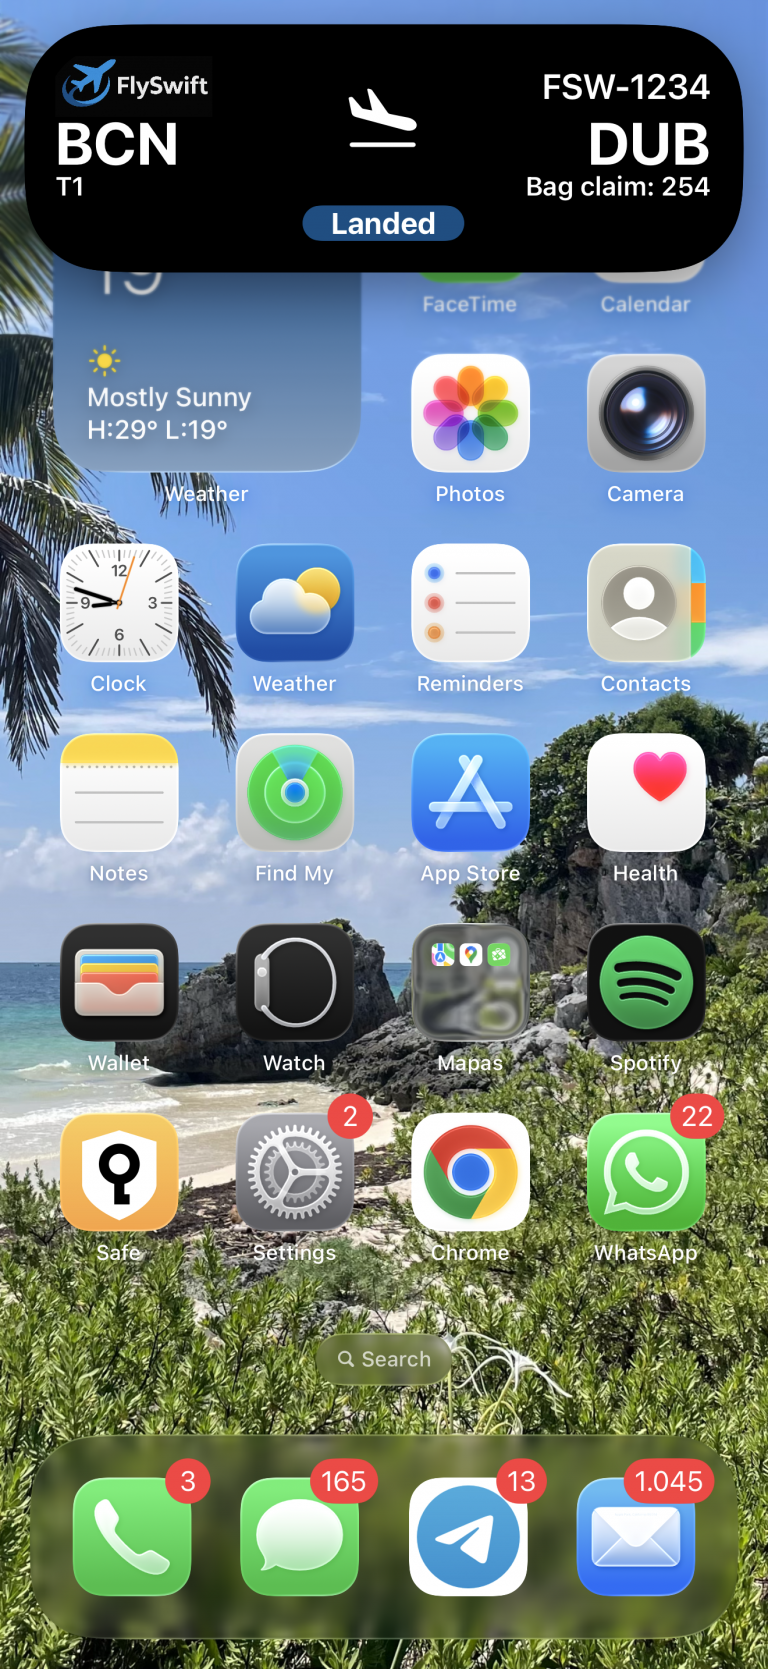
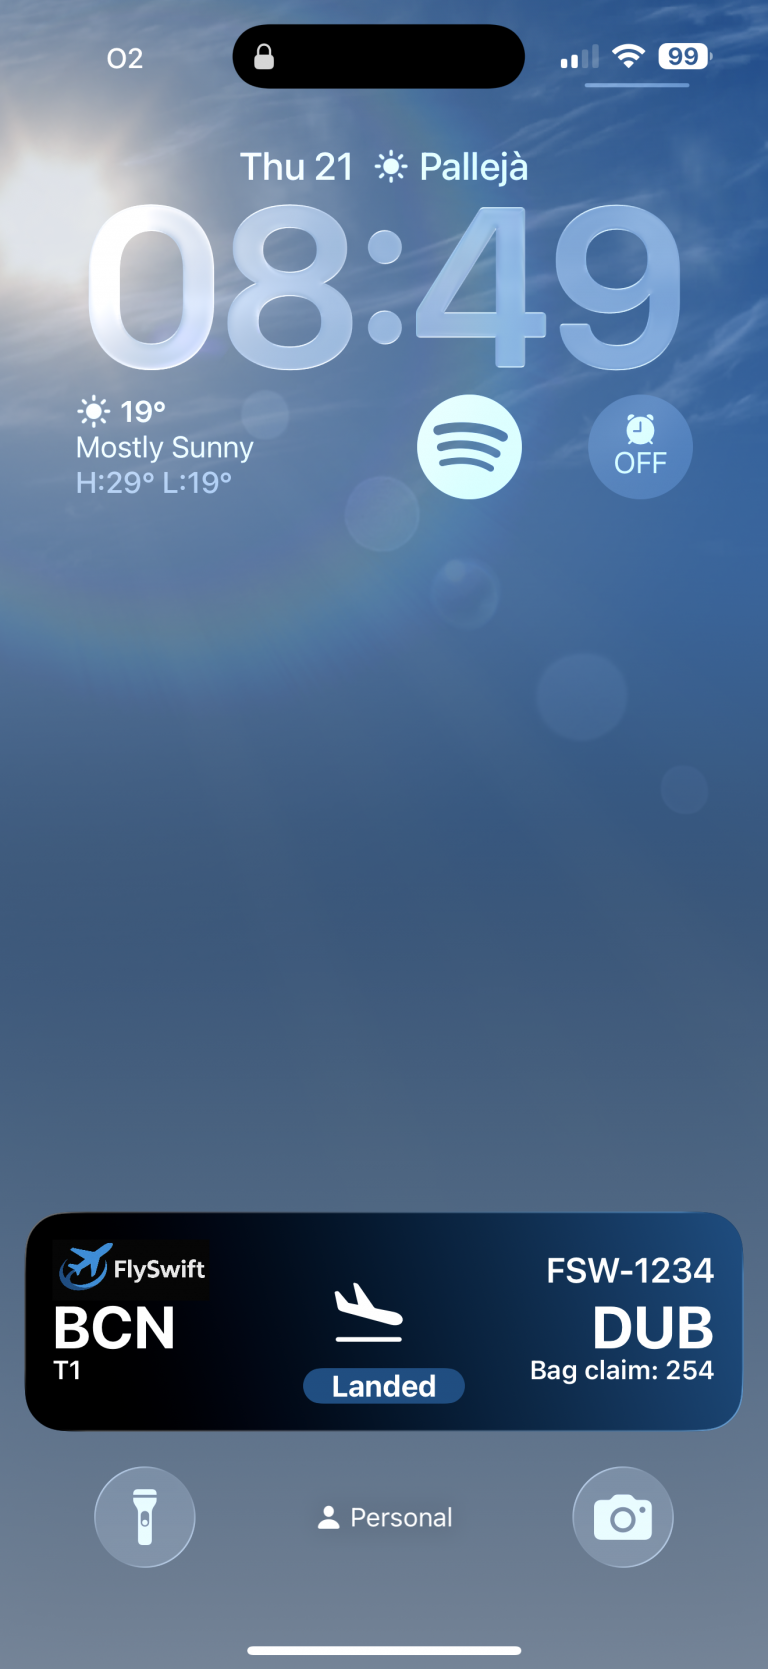
When the push notification arrives, the Dynamic Island first presents it in expanded mode, but shortly after it switches to minimal mode (showing only the app icon). iOS itself decides the order and priority in which multiple Live Activities are presented.
...
struct BookingFlightLiveActivity: Widget {
    var body: some WidgetConfiguration {
        ActivityConfiguration(for: FlightActivityAttributes.self) { context in
...
        } dynamicIsland: { context in
...
            return DynamicIsland {
                ...
            } compactLeading: {
...
            } compactTrailing: {
...
            } minimal: {
                MinimalView()
            }
        }
        .supplementalActivityFamilies([.small, .medium])
    }
}
When reviewing the Widget and Dynamic Island implementation, we can see that there is a section dedicated to defining the minimal view.
Conclusions
Implementing Live Activities in an iOS app enhances user experience by providing real-time, glanceable updates on the Lock Screen and Dynamic Island for ongoing, time-sensitive tasks like deliveries, rides, workouts, live scores or your next flight information. Unlike notifications, which can clutter, Live Activities consolidate progress into a single, dynamic view, keeping users engaged without requiring repeated app opens. They complement widgets by handling short-lived, frequently changing processes while widgets cover persistent summaries. This leads to higher engagement, reduced notification fatigue, improved transparency, and stronger brand presence at high-attention moments—all while offering users quick actions and continuity across app surfaces.
You can find source code that we have used for conducting this post in following GitHub repository.
References
- Meet Activity Kit
WWDC 2023
- Live Activity on iOS
Usefull video that shows you how to build a football (soccer) match live activity


