Building a tab bar in SwiftUI often starts with the simplicity of TabView, but real-world apps quickly demand more flexibility than the default component provides. In this post, we’ll take a practical, step-by-step journey from the standard implementation to a fully customized, animated tab bar—exploring how to progressively enhance styling, restructure layout, and ultimately replace built-in behavior with a state-driven solution. Along the way, we’ll touch on core SwiftUI concepts like data flow, view composition, and animation, using a familiar UI pattern to bridge the gap between basic usage and building polished, production-ready interfaces.
Basic SwiftUI TabBar
The minimum code for implementening a TabBar is just following:
struct ContentView: View {
var body: some View {
TabView {
MainScrollStoryView()
.tabItem {
Label("Home", systemImage: "doc.text.fill")
}
ProfileView()
.tabItem {
Label("Profile", systemImage: "person.circle.fill")
}
SettingsView()
.tabItem {
Label("Settings", systemImage: "gearshape.fill")
}
}
.accentColor(.blue)
}
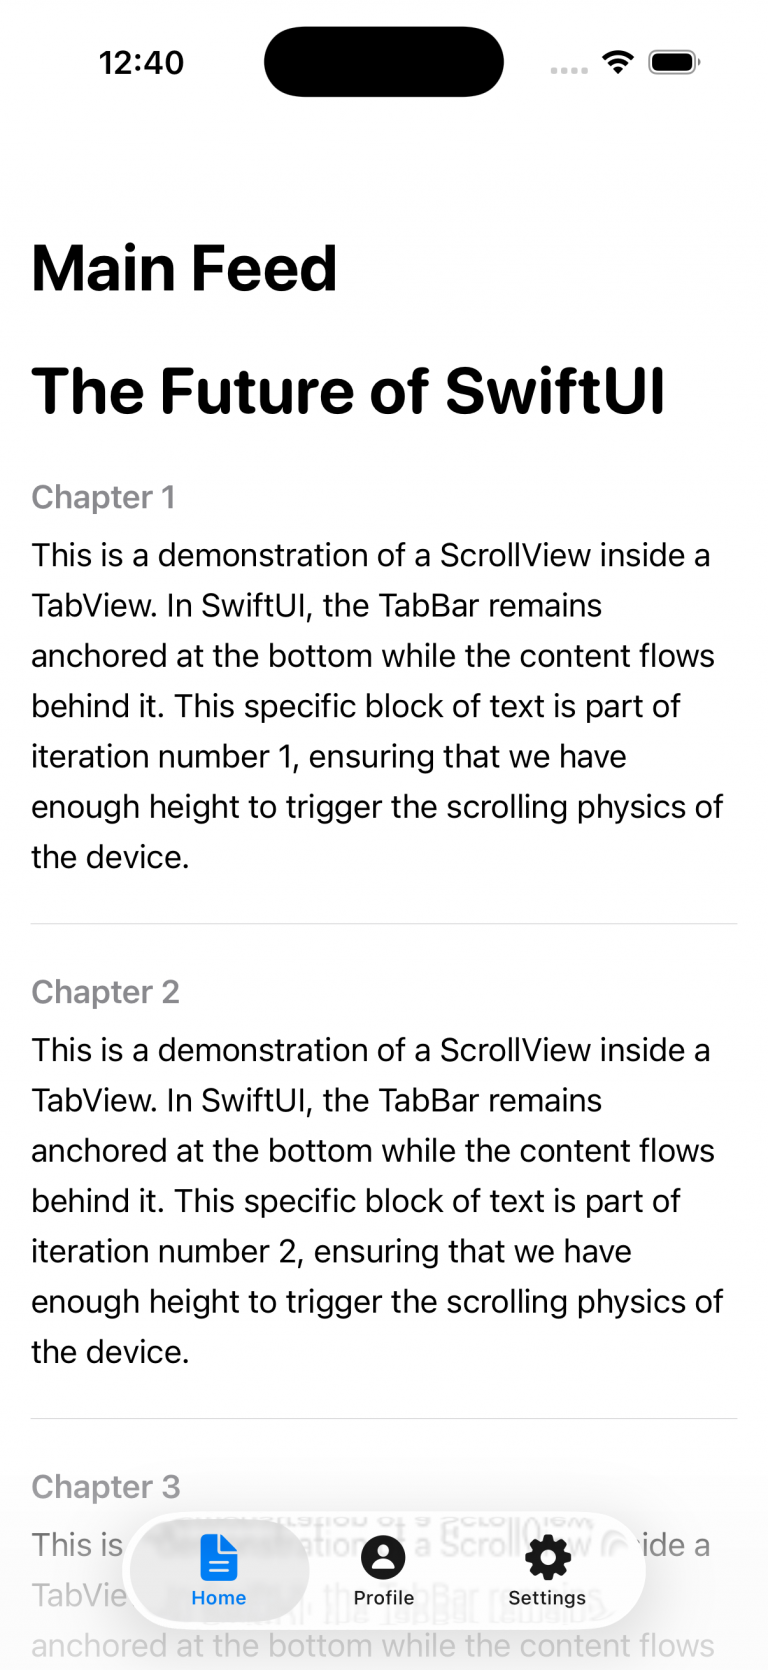
} It defines a tab-based interface in SwiftUI where a TabView presents three sections—Home, Profile, and Settings—each linked to its own view (MainScrollStoryView, ProfileView, and SettingsView); every tab is configured with a Label combining a title and an SF Symbol icon, and the .accentColor(.blue) modifier sets the active tab’s tint color to blue, so when users tap a tab, the corresponding view is displayed while the selected tab is visually highlighted.
This is one of the views attached to one of the tabs:
struct MainScrollStoryView: View {
    var body: some View {
        NavigationStack {
            ScrollView {
                VStack(alignment: .leading, spacing: 25) {
                    Text("The Future of SwiftUI")
                        .font(.system(size: 34, weight: .bold, design: .rounded))
                    ForEach(1...25, id: \.self) { index in
                        VStack(alignment: .leading, spacing: 10) {
                            Text("Chapter \(index)")
                                .font(.headline)
                                .foregroundColor(.secondary)

                            Text("This is a demonstration of a ScrollView inside a TabView. In SwiftUI, the TabBar remains anchored at the bottom while the content flows behind it. This specific block of text is part of iteration number \(index), ensuring that we have enough height to trigger the scrolling physics of the device.")
                                .font(.body)
                                .lineSpacing(6)
                        }
                        Divider()
                    }
                }
                .padding()
            }
            .navigationTitle("Main Feed")
        }
    }
}
As in UIKit, there’s no issue embedding one container controller (e.g., a NavigationStack) inside another container controller (such as a TabBar). And finally the result:
Adapt TabBar to your System Dessign
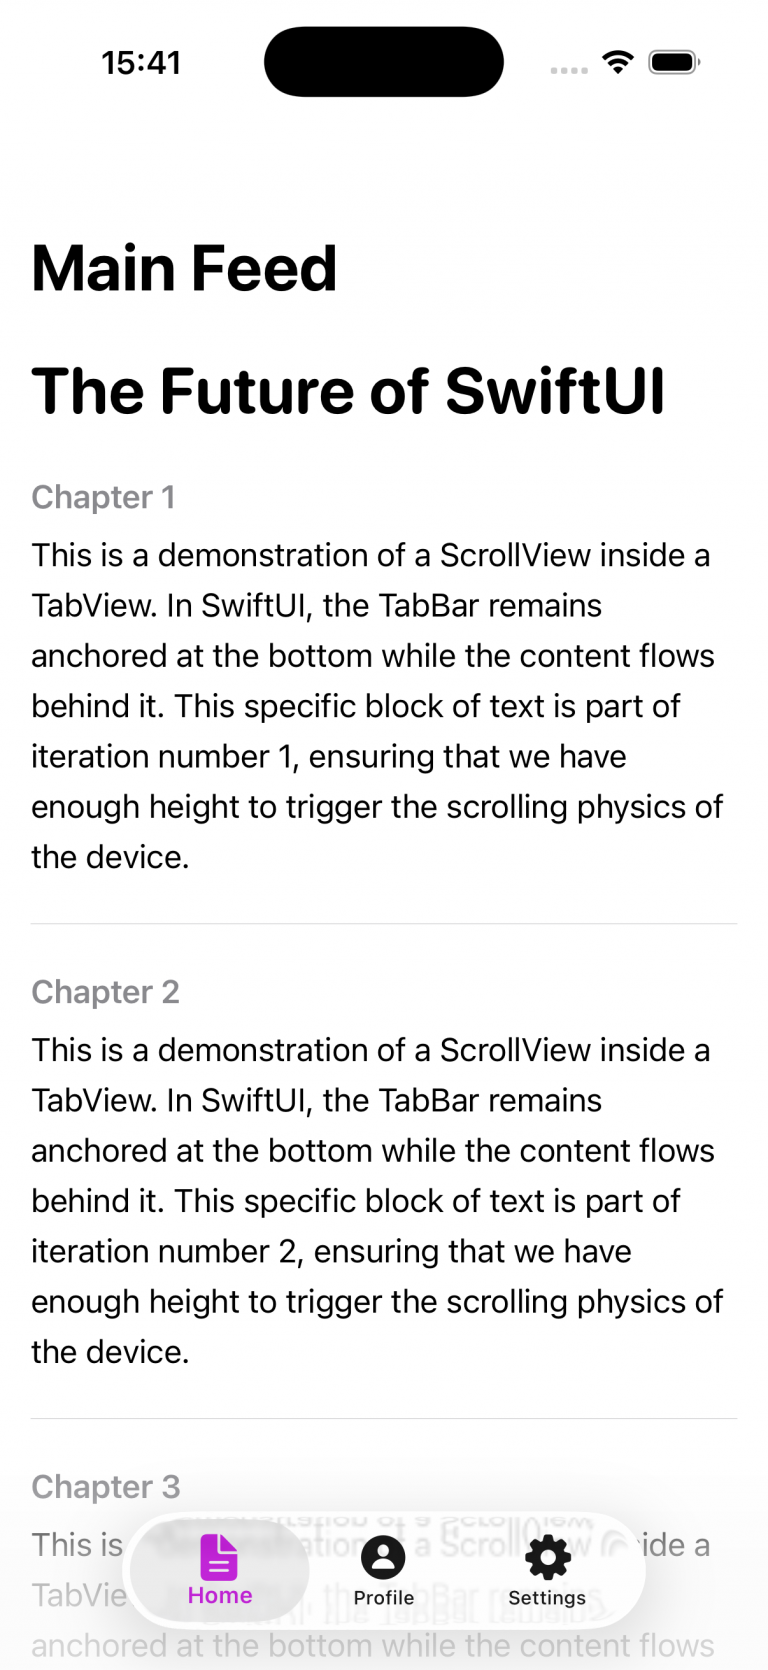
It’s quite common, especially on projects of a certain scale, to work with a UX/UI team that defines and governs the application’s visual design and user experience. In most of the cases they respect HIG (Human Interface Guidelines), so is just customize basically icons, fonts and colors.
struct CustomStyledTabView: View {
    init() {
        let appearance = UITabBarAppearance()
        appearance.configureWithOpaqueBackground()
        appearance.backgroundColor = .systemBackground

        let selectedAttributes: [NSAttributedString.Key: Any] = [
            .foregroundColor: UIColor.systemPurple,
            .font: UIFont.boldSystemFont(ofSize: 12)
        ]

        let normalAttributes: [NSAttributedString.Key: Any] = [
            .foregroundColor: UIColor.gray
        ]

        appearance.stackedLayoutAppearance.selected.titleTextAttributes = selectedAttributes
        appearance.stackedLayoutAppearance.selected.iconColor = .systemPurple

        appearance.stackedLayoutAppearance.normal.titleTextAttributes = normalAttributes
        appearance.stackedLayoutAppearance.normal.iconColor = .gray

        UITabBar.appearance().standardAppearance = appearance
        UITabBar.appearance().scrollEdgeAppearance = appearance
    }

    var body: some View {
        TabView {
            MainScrollStoryView()
                .tabItem {
                    Label("Home", systemImage: "doc.text.fill")
                }
            ProfileView()
                .tabItem {
                    Label("Profile", systemImage: "person.circle.fill")
                }

            SettingsView()
                .tabItem {
                    Label("Settings", systemImage: "gearshape.fill")
                }
        }
    }
}
This SwiftUI View struct customizes the global appearance of all tab bars in the app by configuring a UITabBarAppearance instance during initialization. It sets an opaque background using the system background color, then defines distinct text and icon styles for selected and unselected tab items—selected items appear in purple with a bold font, while unselected ones are gray. These styling attributes are applied specifically to the standard stacked layout used in bottom tab bars. Finally, the configured appearance is assigned to both the standardAppearance and scrollEdgeAppearance of UITabBar via the UIAppearance proxy, ensuring consistent styling across the entire app.
Fully customization
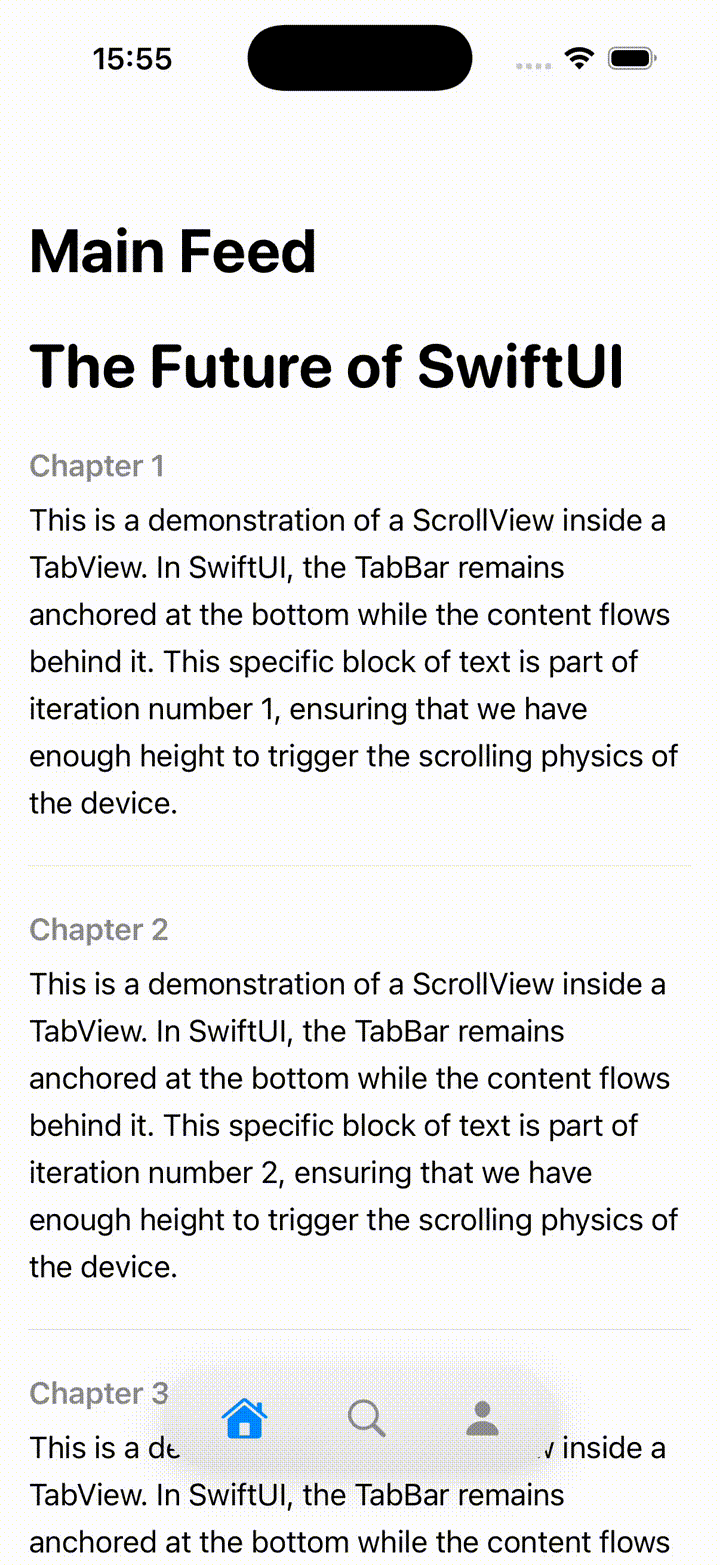
Sometimes the default customization options provided by the SDK aren’t sufficient, and you need to push beyond them—for example, when you want to introduce additional animations.
struct FloatingTabBarView: View {
    @State private var selectedTab = 0
    @State private var isTabBarVisible = true

    var body: some View {
        ZStack(alignment: .bottom) {
            NavigationStack {
                MainScrollStoryView()
                .navigationTitle("Auto-hide Bar")
                .onScrollGeometryChange(for: CGFloat.self) { geo in
                    geo.contentOffset.y
                } action: { oldValue, newValue in
                    let scrollingDown = newValue > oldValue
                    let isAtTop = newValue <= 0

                    withAnimation(.easeInOut(duration: 0.3)) {
                        if isAtTop {
                            isTabBarVisible = true
                        } else if scrollingDown {
                            isTabBarVisible = false
                        } else {
                            isTabBarVisible = true
                        }
                    }
                }
            }
            if isTabBarVisible {
                CustomBar(selectedTab: $selectedTab)
                    .transition(.move(edge: .bottom).combined(with: .opacity))
                    .zIndex(1)
            }
        }
    }
}

struct CustomBar: View {
    @Binding var selectedTab: Int

    var body: some View {
        HStack(spacing: 40) {
            TabBarButton(index: 0, icon: "house.fill", selectedTab: $selectedTab)
            TabBarButton(index: 1, icon: "magnifyingglass", selectedTab: $selectedTab)
            TabBarButton(index: 2, icon: "person.fill", selectedTab: $selectedTab)
        }
        .padding(.horizontal, 30)
        .padding(.vertical, 15)
        .background(.ultraThinMaterial)
        .clipShape(Capsule())
        .shadow(color: .black.opacity(0.15), radius: 10, y: 5)
        .padding(.bottom, 20)
    }
}

struct TabBarButton: View {
    let index: Int
    let icon: String
    @Binding var selectedTab: Int

    var body: some View {
        Button(action: { selectedTab = index }) {
            Image(systemName: icon)
                .font(.system(size: 22))
                .foregroundColor(selectedTab == index ? .blue : .gray)
        }
    }
}
This code defines a custom SwiftUI tab bar system that overlays a floating, animated tab bar on top of a scrollable view. The main FloatingTabBarView uses a ZStack to position content and the tab bar, embedding a NavigationStack with a scrollable MainScrollStoryView. It listens to scroll position changes via onScrollGeometryChange, comparing the previous and current vertical offsets to determine scroll direction. Based on this, it toggles the isTabBarVisible state with a smooth animation: the tab bar hides when the user scrolls down, reappears when scrolling up, and stays visible when the content is at the top.
The CustomBar and TabBarButton components define the visual and interactive behavior of the floating tab bar. CustomBar lays out three tab buttons horizontally inside a capsule-shaped container with a blurred background (ultraThinMaterial) and shadow, giving it a modern floating appearance. Each TabBarButton updates the shared selectedTab binding when tapped and visually reflects its active state by switching icon color between blue (selected) and gray (unselected). The tab bar itself animates in and out using a combined slide-from-bottom and fade transition, creating a polished, dynamic UI effect.
func combineUsage() {
    NotificationCenter.default.publisher(for: UIApplication.didBecomeActiveNotification)
        .sink { _ in
            print("App active")
        }
        .store(in: &cancellables)
}
Conclusions
Across the three examples, we’ve explored how to implement a TabBar, apply basic customization, and extend its behavior beyond the standard capabilities.
You can find the source code for this example in the following GitHub repository.
References
- tabBar
Apple Developer Documentation
- Human Interface Guidelines
Apple Developer Documentation